© Copyright 2016 by The-Box Development
First LoRaWAN sketch
At this point everything is in place to start sending data to The Things Network. We will start with a simple example, the 'Hello World' of LoRaWAN.
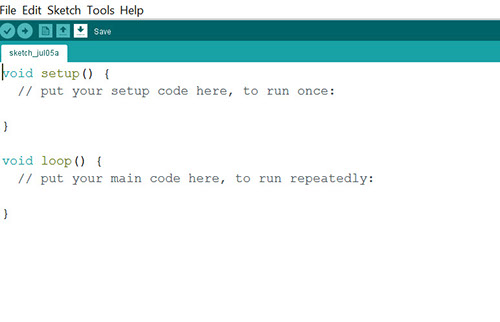
Open the arduino IDE and select 'New' from the 'File' menu. This creates an empty sketch with the two required routines. We will add our code to this sketch.
First we add the TheThingsUno API code. Select 'Sketch',
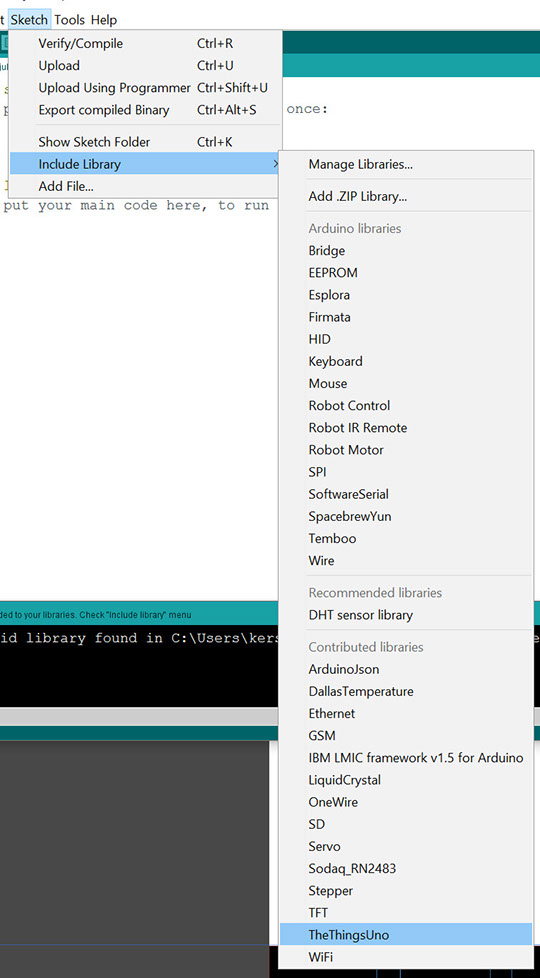
This add #include "TheThingsUno.h" to the start of the sketch.
Next, add the following code between '#include ...' and 'void setup()':
// Set your AppEUI and AppKey
const byte appEui[8] = { <insert AppEui> };
const byte appKey[16] = { <insert AppKey> };
#define debugSerial Serial
#define loraSerial Serial1
// Set your message to send
String message = "Hello world"; //sending a string of chars "Hello world"
#define debugPrintLn(...) { if (debugSerial) debugSerial.println(__VA_ARGS__); }
#define debugPrint(...) { if (debugSerial) debugSerial.print(__VA_ARGS__); }
TheThingsUno ttu;
This code defines a number of constants required to direct the debugging output to the USB serial port and the commands for the LoRaWAN module to the hardware serial port of the arduino.
It also contains two lines we need to modify with application and device specific information. Open the application information in your browser and click twice on the "<>" next to "App EUI". The format of the output should change and at the end of the line there it should say 'msb' (light gray).
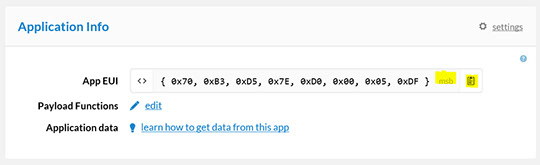
Click on the icon to the right of 'msb' to copy the string to the clipboard. Now edit the line 'const byte appEui[8] = ' to include the copied text. (Make sure there is only one set of curly braches '{}')
We also need to include the unique appKey for this device. Get it by clicking on the device identifier on the application page, this opens the device information with the sensitive information hidden. Click twice on the "<>" symbol next to "App Key" (not App Session Key) to switch to "msb' mode and click on the eye symbol, this shows the secret key.
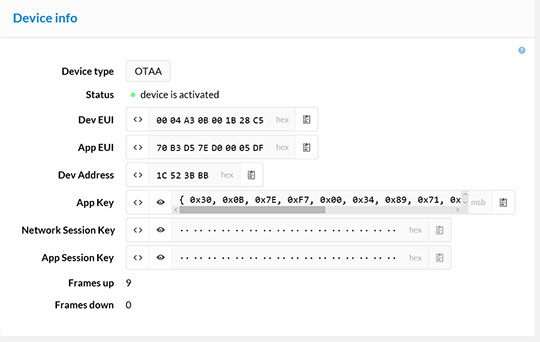
Click on the icon at the end of the line to copy the data and use it to modify the line const byte appKey[16] = .
Next we need to implement the initialization code in the setup routine.
Replace the existing setup routine with:
void setup() {
debugSerial.begin(115200);
loraSerial.begin(57600);
delay(1000);
ttu.init(loraSerial, debugSerial);
ttu.reset();
//the device will attempt a join every second till the join is successfull
while(!ttu.join(appEui, appKey)){
delay(6000);
}
digitalWrite(13, HIGH); //turn on LED to confirm join
delay(6000);
ttu.showStatus();
debugPrintLn("Setup for The Things Network complete");
delay(1000);
}
This block of code starts with setting the parameters of the serial ports. (The LoRaWAN module communicates at 57600 bps)
Next the API is initialized and the module reset.
The 'join' call uses the two constants we previously customized to connect to The Things Network using 'Over The Air Activation' (OTAA). During this process the module gets assigned a random unique address and several counters in the back-end are reset. This procedure requires bidirectional communication with The Things Network, it will fail if the node is out of reach of TTN gateways. Because of the loop (while) the sketch continues trying to join the network every 6 seconds before it proceeds to the next step.
The 'L' led is activated to show the node is joined and status information is displayed to the serial monitor.
Now the module has been set up correctly we can start sending data. This will be done in the 'main' loop of the sketch:
void loop() {
ttu.sendString(message);
delay(20000);
}
The code sends the ASCII message defined earlier every 20 seconds.
WARNING:
- Sending ASCII information is (usually) a waste of airtime, use binary whenever possible.
- Sending this often will 'burn' the entire daily airtime allowance in a couple of hours.
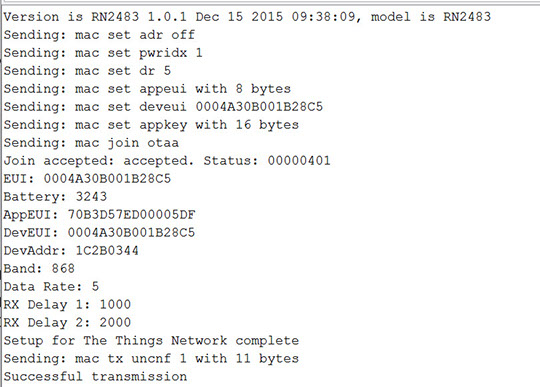
Compile the code and upload it to the arduino. The serial terminal should look like:
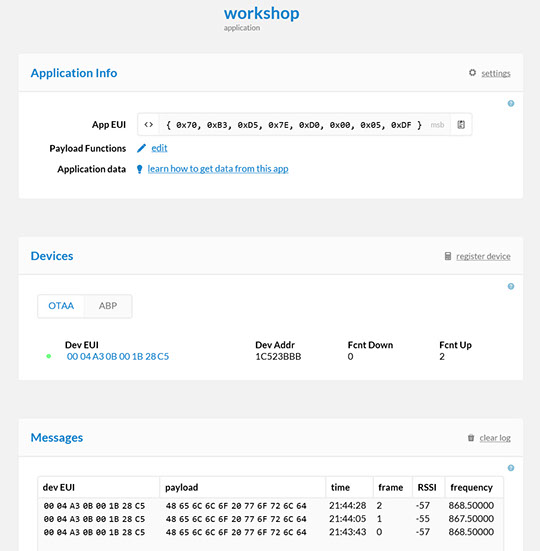
The application details in your browser should show data as well:
Congratulations! You succesfully transmitted your data to The Things Network!